Uninstalling a program from your computer is widely recognized as a fundamental skill within the field of computing because of its substantial influence on system performance and storage space management. This task plays a crucial role in ensuring that your device operates at its peak performance levels while also optimizing storage space usage. By removing unnecessary programs, you can enhance your computer’s overall functionality and efficiency. For those who are not well-versed in the process of uninstalling programs, it can initially appear challenging and overwhelming. Therefore, it is essential to have a thorough understanding of the steps involved in order to smoothly and successfully remove a program from your computer system.
Here’s a short guide, complete with pictures, to help get you uninstall any program you don’t want anymore.
First, click the start button at the bottom left of your screen, if you have one. From the menu that pops up, click on “Control Panel”.
If you’re using Windows 8, move your mouse all the way to the bottom left of your screen and right click. This should bring up a little menu that you can select “Control Panel” from.
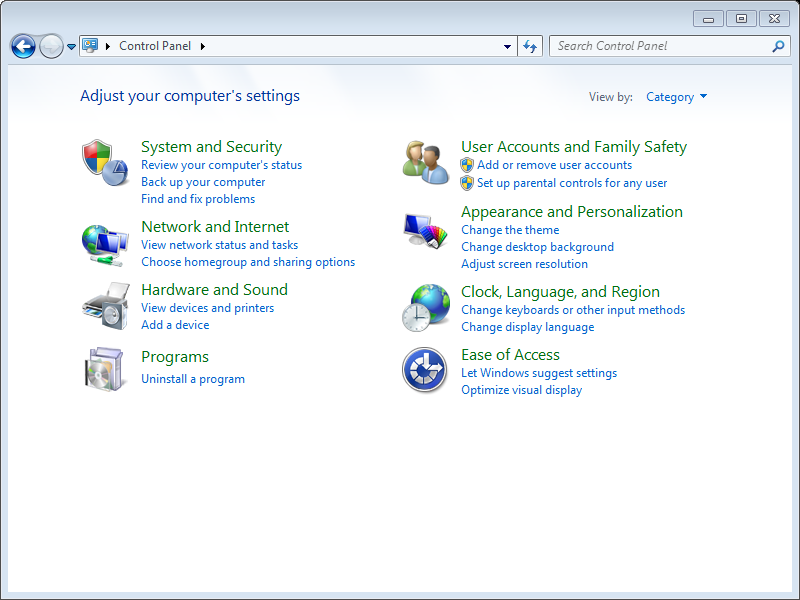
Once you’ve opened the control panel, there should be a category listed called “Programs” with the words “Uninstall a program” underneath it. Click on the “Uninstall a program” line.

Now you’ve opened up the Windows program uninstall interface. It should show you a list of all the programs Windows knows about that are installed on your computer. (Some programs may not show up here, but removing those is a lesson for another day.)
Click on the program you want to uninstall. It should be highlighted. You can then either right click on that program name and select “Uninstall” or you can click the word “Uninstall” that appears above the programs list.
After you click Uninstall the program’s uninstaller will run. This will be a little different for each program, but the general rule is just follow the directions you see on screen.
That’s it. You’ve just uninstalled a program. This will work for just about any program on your computer, so be careful that you don’t uninstall something you really want to keep!
Have a program on your computer you just can’t get rid of? ZookaWare Remote Technical Support technicians are here to help 24/7.


